Looking for a side dish that’ll convert even the pickiest eaters? These pan-fried Brussels sprouts with crispy bacon are about to become your secret weapon. With just two main ingredients and minimal fuss, you’ll have a restaurant-quality side that works for Tuesday dinner or Thanksgiving feast.
Why This Recipe Works
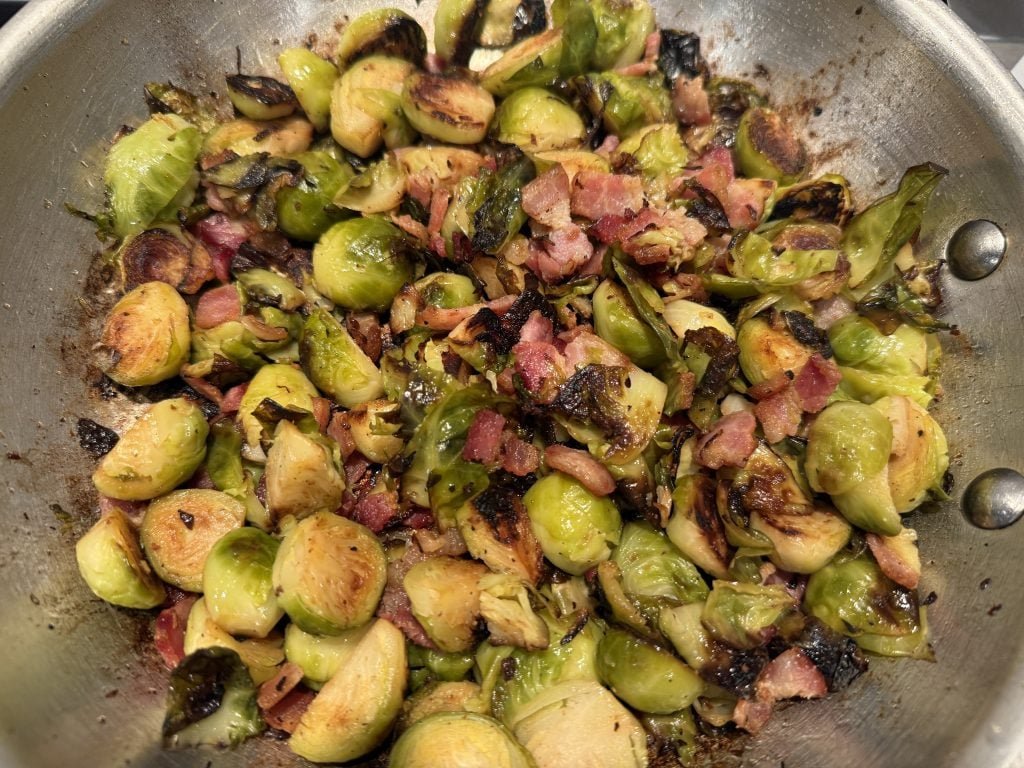
Here’s the thing about Brussels sprouts: they’ve gotten a bad rap over the years, mostly because people have been cooking them all wrong. But when you sear these little green gems in bacon drippings until they’re caramelized and tender? That’s when the magic happens.
The salty, smoky bacon fat does double duty here, infusing every bite with incredible flavor while helping achieve that gorgeous golden-brown exterior. And unlike roasted versions that need your oven tied up for half an hour, this stovetop method delivers crispy results in about 20 minutes flat.
The best part? You probably already have everything you need sitting in your fridge right now.

Ingredients You’ll Need
- Fresh Brussels sprouts – Look for firm, bright green specimens without yellowing leaves. Smaller sprouts tend to have a sweeter, milder taste, but any size works as long as they’re roughly uniform so they cook evenly.
- Bacon strips – Regular cut works perfectly. The rendered fat becomes your cooking medium and flavor foundation, so don’t skimp on quality here.
- Salt and black pepper – For finishing touches, though you might not need much salt thanks to the bacon
Smart Shopping and Prep Tips
When you’re at the market, give those sprouts a good look. You want tight, compact heads with no soft spots or funky smells. The outer leaves should be vibrant green without browning. If you see any loose or damaged leaves, just peel them off before cooking.
As for the bacon, thickness matters less than you’d think. Standard-cut bacon crisps up nicely and leaves plenty of rendered fat for cooking. If you only have thick-cut, just chop it a bit smaller and give it an extra minute or two in the pan.
Step-by-Step Cooking Instructions
Getting Started
First things first: prep your Brussels sprouts by trimming the stem ends and slicing each one in half lengthwise. Don’t overthink it, just a quick slice through the middle works great. Set them aside while you handle the bacon.

Grab your kitchen scissors or a sharp knife and cut your bacon into bite-sized pieces, about half an inch wide. This makes everything easier to eat and ensures you get bacon in every forkful.

Cooking the Bacon
Heat up your skillet over medium-high and toss in the bacon pieces. Let them sizzle and dance around until they’re nice and crispy, this usually takes about 6-8 minutes. You want them golden and crunchy, not burnt.

Use a slotted spoon to fish out the bacon and let it drain on a paper towel, but here’s the crucial part: leave all that beautiful bacon fat right where it is.

Cooking the Brussels Sprouts
Now comes the fun part. Add your halved Brussels sprouts to the bacon-fat-slicked pan, cut side down when possible. Give them a good toss to coat them thoroughly in the fat, this is where the flavor magic begins.

Pop a lid on the skillet and dial the heat back to medium-low. This creates a steamy environment that helps tenderize the sprouts without turning them to mush. Let them cook covered for about 5 minutes. You’re essentially giving them a head start on cooking through.

Bringing It All Together
Remove the lid and toss the bacon back into the party. Now you can cook everything together uncovered, stirring occasionally, until the sprouts hit your ideal texture. Like them on the tender side? Keep the lid nearby and cover them for a few more minutes. Prefer them with some bite and extra caramelization? Let them hang out uncovered a bit longer, developing those gorgeous brown spots.

Give everything a final taste and adjust seasoning with salt and pepper if needed. The bacon usually provides plenty of saltiness, so go easy at first.
Pro Tips for Perfect Results
Here are a few tricks I’ve picked up that make all the difference:
- Don’t rush the covered cooking phase, those Brussels need time to soften up before browning. If you crank the heat too high too fast, you’ll end up with burnt exteriors and crunchy centers.
- The size of your sprouts directly impacts cooking time. If you’ve got massive ones, add a few extra minutes to the covered cooking stage. Baby sprouts might be done even faster.
- Resist the urge to stir constantly. Let those cut sides sit against the hot pan to develop proper caramelization.
- No need to boil or blanch the sprouts beforehand, the pan-steaming method does all the work.

Mix It Up: Fun Variations
Once you’ve mastered the basic version, try these creative twists:
- Drizzle with a touch of maple syrup during the last minute of cooking for sweet-savory perfection
- Hit them with a splash of balsamic vinegar right before serving for tangy brightness
- Toss in some minced garlic during the final few minutes
- Sprinkle with toasted pine nuts or pecans for extra crunch
- Add a squeeze of fresh lemon juice to cut through the richness
What to Serve Alongside
These bacon Brussels sprouts are total team players, they complement just about any main course you can imagine. Pair them with a juicy roasted chicken for Sunday dinner, serve alongside grilled steaks for date night, or include them in your holiday spread next to the turkey and mashed potatoes. They’re equally at home on a weeknight plate with simple pork chops or dressed up for special occasions.
The rich, savory profile makes them particularly nice with dishes that have some acidity or brightness, helping balance out your meal.
Storage and Reheating
Got leftovers? Lucky you! Store them in an airtight container in the refrigerator where they’ll keep for up to 3 days. Fair warning though, they’ll soften up a bit as they sit, losing some of that fresh-cooked texture.
When you’re ready to reheat, your best bet is a skillet over medium-low heat. This helps restore some crispness that the microwave would completely destroy. Alternatively, spread them on a baking sheet and warm them in a 350°F oven for about 10 minutes.
Freezing isn’t ideal since the bacon tends to lose its crispy texture, but if you must, they’ll survive for up to a month. Just know they won’t be quite as spectacular as fresh.
Common Questions
Can I use frozen Brussels sprouts?
Fresh sprouts work best for texture and flavor. Frozen ones tend to release a lot of moisture and can turn mushy. If frozen is all you’ve got, thaw them completely, pat them very dry, and reduce the covered cooking time.
What if I don’t have enough bacon grease?
If your bacon seems stingy with the fat, add a tablespoon of butter or olive oil to the pan before adding the sprouts. You want enough fat to coat them well.
How do I know when they’re done?
Pierce one with a fork, it should slide in relatively easily, but the sprout should still hold its shape. If they fall apart, you’ve gone too far. A bit of resistance is actually nice.
If you’ve been sleeping on Brussels sprouts, this recipe is your wake-up call. The combination of crispy bacon, caramelized edges, and tender centers creates a side dish that regularly steals the spotlight from the main course. Plus, with only two key ingredients and one pan, cleanup is a breeze.
Give this recipe a shot and watch it become one of those dishes you make again and again. Your dinner guests will thank you, and you might just convert a few Brussels sprouts skeptics along the way.